How do you know what kind of foundation you have to use? What’s the difference between liquid and gel eyeliner? Where you are supposed to apply bronzer? What is highlighter? And for goodness’ sake, how on earth do you get it all to stay on through an eight-hour work day?
Ladies, if you are confused by the modern application methods of makeup, know you are not alone. With all of the different YouTube tutorials and the elusively vague Pinterest links or Instagram videos floating around on the internet, nailing down a beauty routine can be perplexing and frustrating; especially if you have never been educated in the magical realm of cosmetics.
Also Read: Creating & Building The Makeup Kit For Special Occasion
But fear not! You are just a few simple tips away from understanding makeup and what will work best for you…as long as you’re willing to spend a little extra time on your beauty routine in the mornings!
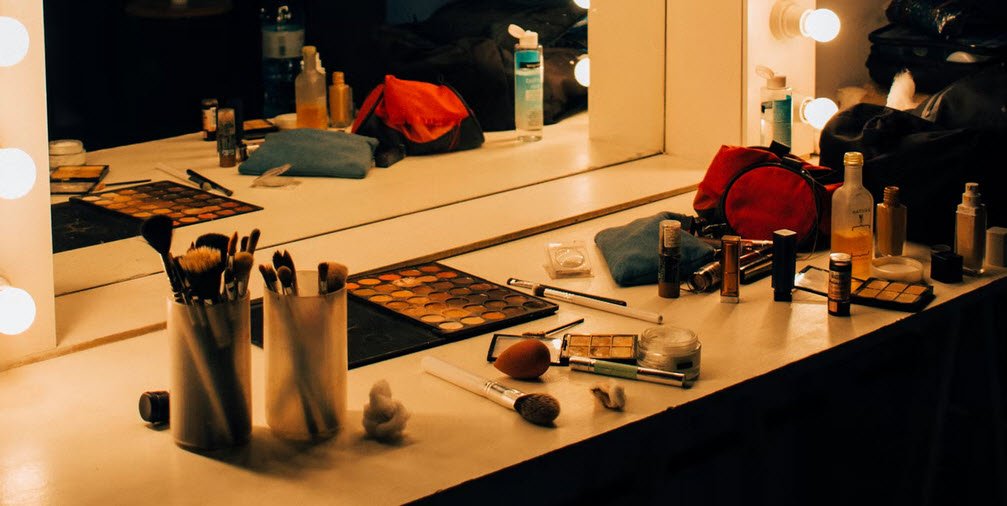
Professional Tools
Before you even think about even the beginning stages of your beauty routine, you’re going to want to stock up on some quality brushes and other tools. Having professional materials is important, especially for women who are new to makeup, because even if you’re a total novice, simply having the right tools will improve your makeup game by 100%.
There are endless amounts and different types of makeup brushes and they all do different things. However, we’re just going to show you the basics to get started.
1. Stippled Foundation Brush
The first brush you’ll want to invest in is a stippled foundation brush. This brush is made specifically for applying liquid foundation. If you’ve been using your fingers, please just stop. Pick up one of these guys instead. Your foundation coverage will improve noticeably with this brush.
2. Bronzer Brush
Next, invest in a quality bronzer brush. You need a brush specifically for bronzer simply because it should not be applied in the same way as foundation or blush. A bronzer brush will give you an effortless glow without making you look muddy.
3. Kabuki Brush
You also need – yes, need – a kabuki brush. It’s magical. It can be used for just about anything but you use it to blend your contour, highlight, and blush together and for one last buff and sweep.
4. Concealer Brush
You need this concealer brush because none of us have perfect skin and we all break out sometimes. This brush will apply your favorite concealer like a dream.
5. Eyeshadow Brushes
There are dozens of different types of eyeshadow brushes, but if you’re just starting out, all you need is a standard issue shadow brush. It does everything from packing on colors to blending out the crease colors, so you’ll be set with this for a while.
6. Sponge
Behold, the return of the makeup sponge! Not only is this thing so soft that it’s probably made of whatever babies’ butts are made of, but it makes you look like an airbrushed porcelain doll.
Step One: Prepare Your Skin!
First, decide if your skin is oily or dry. The very first thing you must do to prepare your skin for cosmetics is decide whether your skin is oily or dry. Doing this will help you decide what types of cosmetics to buy.
- Does your face often look shiny throughout the day? Does your liquid makeup tend to “sweat” off easily? If so, your skin is probably oily.
- Does your face feel tight in the mornings and after showers? Do your lips chap easily? If this is the case, you probably have dry skin.
Everyone’s skin is different, so get to know yourself and how your skin works. Knowing what kind of skin you have will determine many other things about your beauty routine, such as the cleansers, moisturizers, and makeup products you choose.
Next, choose a cleanser and moisturizer. Time to do some research! Read reviews and critiques and figure out what other ladies with your skin type are using.
You may read: Important Things To Know When Doing Makeup For Photography
Excess oil on your face is your skin’s way of over-compensating because it’s dehydrated, so moisturize like your life depends on it! If your skin is dry, be sure to choose a cleanser that also exfoliates. All the moisturizer in the world won’t help if you don’t buff away the dry, flaky skin. Don’t exfoliate every day, though! Too much of anything isn’t good for you, and you don’t want to tire your skin out from too much exfoliation.
Step Two: Primer, Foundation, and Concealer
Start with a clean, moisturized and primed face. Before you slather on that foundation like sunscreen, you’re going to want to prime your skin. Primer evens your skin tone, reduces the appearance of pores, and generally just makes your makeup stay in place longer.
Next, apply your foundation. There are many different types of foundation, ranging from loose to pressed powders and from creams to liquids. Oily-faced ladies are going to want to stick with the powders, while those of you with dryer faces will want to go with creams and liquids. It can be daunting to find a foundation that works for you.
Now use concealer to hide your problem areas, such as zits, scars, and dark circles. Your concealer should be a shade lighter than your foundation. When concealing zits, just apply the concealer and blend it in. Use a green concealer for best results.
Green concealer is an actual thing, and it works wonders. Green cancels out red, so when you use a green concealer, your zits are hidden much more so than if you opt for regular concealer. When concealing underneath your eyes to hide dark circles, be sure to apply a considerable amount underneath the dark circles, down to the end of your nose.
Blend downward and outward with a kabuki brush or with your makeup sponge. This will give you a brighter look and make you appear much more awake.
Step Three: Contour and Highlight!
Contouring and highlighting is the best way to make yourself appear bright and fresh faced. Until just recently, every-day, ordinary women didn’t know much about contouring and highlighting.
Suggested Read: Eye Makeup Tips and Tricks – A Beginners Guide
Until the recent development of “internet cosmetology,” even the most cosmetically aware of us just slapped some bronzer on our cheeks and called it a day. However, we are now much more aware and are thankful for the magic that is contouring and highlighting.
- First, draw your contour lines. First off, your contour—whether it is a cream, pencil, or pressed powder—should be two to three shades darker than your skin.
- Apply contour to the top and sides of your forehead, on the sides of your nose, and from the top of your ear to about halfway down your cheek bone into the hollows of your cheeks.
- Be careful not to draw your contour lines in this area too high or too low, because this can make your cheeks look saggy.
- Next, apply your highlighter. Your highlighter should be two to three shades lighter than your skin.
- Apply the highlighter to your chin, nose, forehead, and underneath the eyes. Blend everything together with a kabuki brush or with your makeup sponge.
Step Four: All about the Eyes
First, fill in those eyebrows! Eyebrows can make or break your entire look. Unfortunately, many women don’t consider their eyebrows when applying makeup. Bad, misshapen eyebrows can make you look sad, mad, tired, or old, so don’t ignore them during your makeup routine!
Start by having your eyebrows professionally waxed or threaded for the most flattering shape possible. After that, it’s pretty easy. Just fill in your brows with a pencil or gel, making light, upward strokes with the grain of your eyebrow hairs.
Stick with the natural shape of your brows for the most natural look possible. Lightly apply concealer underneath and above the brows with a concealer brush to blur away any harsh lines. Don’t get too anal about your eyebrows matching exactly. Eyebrows are sisters, not twins!
Next, choose a color for your eyeshadow. Eyeshadow, in our opinion, is the trickiest part about a beauty routine, as there are many different eye shapes and colors that must be taken into consideration. For instance, if you have deep set green eyes, you’ll want to stick with neutral tones such as golds and deep browns, or perhaps you will want to take a more daring course and opt for some plum-colored tones.
If you have hooded brown eyes, you will want to choose lighter tones with darker tones in the crease to brighten and shape your eyes. Remember that not every woman has the same style. Some prefer to be glitzy and glamorous, while others crave a more natural, effortless look.
We advise that you experiment with different brands and colors to determine what best suits you and your style.
Now, apply the eyeshadow. After you decide on a color palate, you’re going to follow a tried-and-true method of applying eyeshadow. For this method, you will need four different shades of the same color of eyeshadow.
These four shades should consist of a highlighter (not the same highlighter you used with your contour—for this highlight, you will want a very light beige or white shadow), a shimmery shade (or just pale if you prefer a more matte look), a medium shade, and a dark shade.
- Apply an eyeshadow primer or concealer on the entire eyelid. This will not only make your eyeshadow more resilient, but will make it appear brighter and more pigmented.
- Apply the medium shade on the entire lid up to your brow bone with your shadow brush.
- Blend the dark shade on your outer lid inward, creating a gradient look. Also apply this shade in your crease.
- Apply the highlighter above your brow bone and in the inner corner of your eyelid.
- Apply the sparkle or pale shadow on the center of your eyelid. Blend everything together with a clean shadow brush.
It’s time for eyeliner! Of all the methods of lining one’s eyes. Your best bet is to use a gel liner with an angled brush or a liquid liner for a clean, precise line.
When doing your eyeliner, remember to relax. If you’re a perfectionist like me, it’s easy to get frustrated when the lines aren’t even or when they smudge. Use a Q- tip to clean your lines up if things get messy. Also remember that practice makes perfect, and the more you experiment, the better you’ll get at “winging” your eyeliner.
Lastly, apply your mascara. Whether you want full lashes or long, wiry ones, a perfect mascara brush that will fit your explicit needs. After curling your lashes, apply your mascara in three coats.
- For the first coat, coax your lashes inward with the mascara brush.
- For the second coat, paint each lash with the tapered end.
- Finish with the third coat by fanning your lashes with the brush.
If you want an even more intense look, sweep on some baby powder with a Q-tip between each coat for longer, thicker lashes. Add one more coat for good measure and you’re good to go!
Step Five: Love those Lips
To top it all off, choose a lip stick/lip gloss/lip stain. There are plenty of options are available that allow for a natural, yet stunning look.
However, some of you might prefer a more understated eye with a bold lip. Our favorite thing about any lipstick is that it does not wear off easily. If you love red lipstick and want to avoid looking like you just ate a red popsicle halfway through your day, invest in this high quality lipstick by NARS.
Step Six: Be Fabulous
Now that your look is finished, the final step is to simply be comfortable and confident. The whole point of makeup is to accentuate what you love most about yourself, so don’t use it just to hide the things you hate.
There is absolutely no shame in loving makeup and cosmetics. Conversely, you should never feel obligated to wear it, either. Ladies, whatever you do or don’t do when it comes to your beauty routine, do it or don’t do it for you. Whatever your makeup routine is, from the most basic to elaborate, have fun with it and use it to love yourself in the process.
And don’t ever let anyone tell you how you should look or feel about your outer appearance! Believe that you are beautiful whether you skin is bare or all dolled up. So be sure of yourself whether you’re going to the grocery store or the club – because confidence is sexy!
You may also like:- 10 High-ROI Activities to Accelerate Your Career and Live a Happier Life
- 22 Powerful Open-Ended Questions to Ask a Woman
- 10 Rules That Will Make You Dangerously Confident
- 10 Dangerous Signs of Weak Men
- 50 Masculine Truths 98% of Men Don’t Know
- 13 Fashion Tips To Make You More Appealing To Women
- 12 Things a Father Must Say and Teach to His Son
- 26 Signs You Might Be a Sigma Male
- 17 Psychological Tricks of a Bad Boy That Instantly Hypnotize Any Woman
- 15 Ways to Be the Best at What You Do