Eyes are arguably one of the most important features on the face, and it is especially important to accentuate them for a wedding or special event. Since the shape, colour and size of eyes can vary significantly, it is essential to understand how to best apply makeup for each client’s eyes.
Also Read: Get Ready For Natural Face Makeup – A Step by Step Guide
There are many different factors when applying makeup to the eyes, and it is definitely not a one size fits all process. In this module, you will learn how to determine a client’s eye shape, choosing the perfect colour palette and products, best application techniques and even how to apply false lashes.
Determining the Eye Shape
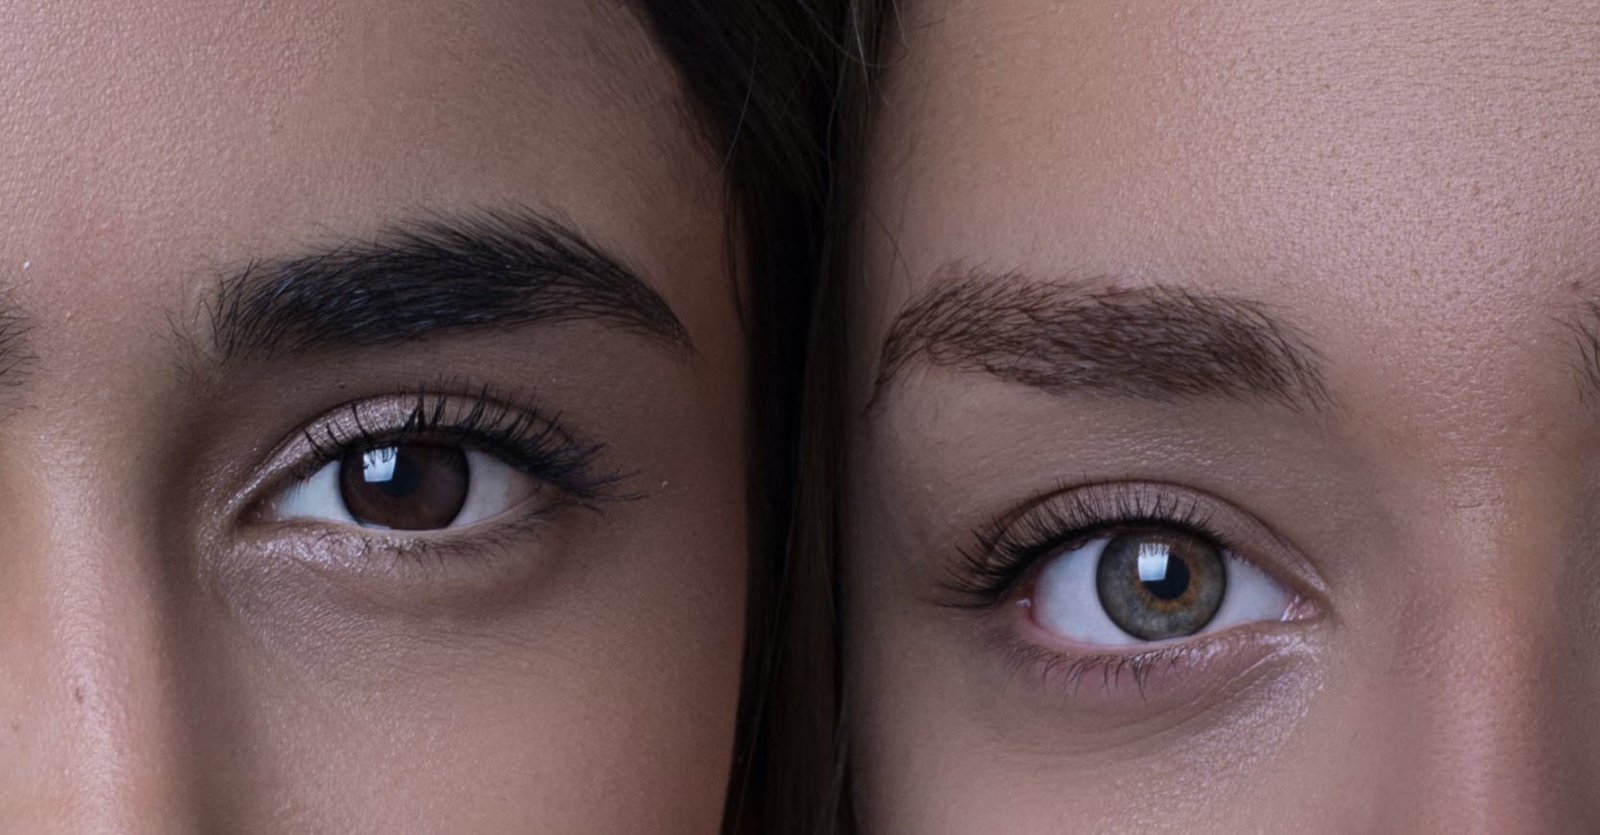
There are a number of different eye shapes, and each shapes requires a different application of eye makeup. It is critical to take a moment to determine the eye shape of your client, and change your application to meet their needs. By developing a strong understanding of the different eye shapes, you will be able to quickly assess the eye shape of any client.
- Monolid Eyes: Do you see a crease when looking at your client’s eyes? If you answered no, then your client has monolid eyes. Monolid eyes may appear flat on the surface, with little to no crease. Additionally, the brow bone will appear less defined or even flush with the lid.
- Upturned Eyes: If your client has a crease, then there are a few additional steps needed to determine the eye shape. If the corners of your client’s eyes turn up slightly, then they have upturned eyes. Upturned eyes have a visible eyelid, and have a natural lift at the outer corner. The bottom lash line may appear longer than the top lash line, which is caused by the natural upward turn.
- Downturned Eyes: If you determine your client’s outer corner turns down slightly, then they have downturned eyes. Downturned eyes, as their name sounds, have a slight dropping on the outer corners while still maintaining a visible lid.
- Round Eyes: For eyes that go generally straight across, you will next want to look at the irises of the eye. If there is any white visible around the irises that is a sign that your client likely has round eyes. Round eyes often seem larger, and have a larger vertical width compared to many other eye shapes.
- Almond Eyes: Like their namesake, almond eyes follow the general shape of the healthy nut. Similar to round eyes, almond eyes go generally straight across but have less visible white space than round eyes. The irises often disappear behind the upper and lash line, and there is more length to the eye than height. Almond eyes are considered the most common eye shape.
- Hooded Eyes: If your client has a crease but it seems to be hidden, they likely have hooded eyes. Hooded eyes have an extra bit of skin that comes down and covers up the crease, making it appear hidden. The eyelid may seem smaller or disappear altogether, and the brow bone may seem more prominent than the lid or crease.
Eye Shape Makeup Application
Now that you understand how to determine your client’s eye shape, you need to know how to best apply makeup for each eye shape! This knowledge will ensure that you can achieve your client’s desired eye look, and avoid taking a one size fits all approach. It is essential to cater your eye makeup looks to your individual client, and we will walk through some of the best tips and tricks for accentuating your client’s eyes.
- Monolid Eyes: Many people will overcompensate for their monolids by applying extremely thick eyeliner, but that can look harsh if done incorrectly. Instead, use a darker eyeshadow to draw out a cat eye and winged liner effect. The darker colour will make your eyes appear larger and rounder. Keep your darker shade focused on the outer corner, and bring a lighter highlight shade in the inner corner to brighten your eyes. Finish off with a thin line of liquid eyeliner, and a volumizing mascara to complete the look.
- Upturned Eyes: Upturned eyes are the perfect shape to follow a classic smokey eye technique. Start by putting a lighter shade on the inner half of your lid. Follow up with a medium shade on the outer half of your lid, and line your top lashline with a line that gets slightly thicker as you reach the outer corner. For a more intense look, add a bit of depth into the outer corner with a deeper shade of eyeshadow. You’ll enhance your eye’s natural upward lift.
- Downturned Eyes: Eyeliner will be a key component in giving downturned eyes a little lift. Start by sweeping the lid with a lighter shade, and then blending a medium shade into the natural crease. Take a liquid eyeliner, and line the upper lash line with a strong winged shape or cat eye. Bring your liner out past the corner and finish it with an upward curve to complete the cat eye.
Round Eyes: Round eyes are typically slightly larger, so you will want to highlight the inner corner and brow bone. Take a darker shade, and buff into the crease and outer corner to elongate your eyes. Line the entire upper lash line, and finish with a small cat eye to further lengthen the eye shape. - Almond Eyes: Because almond eyes are the most symmetrical, almost any eye makeup will look beautiful on this eye shape! Start by sweeping a lighter shade all over the lid, and buff a medium shadow into the crease. Play around with deepening up the crease, and even add some intensity with a bit of shimmer. Lengthening mascara will enhance any eye look, and help accentuate the shadow.
- Hooded Eyes: When it comes to applying makeup to hooded eyes, it is essential to follow great blending techniques to prevent transfer from the lash line to the upper lid. Sweep a medium shade across the entire lid, and blend upwards above the crease. Use a darker shade around the crease to help further define and contour the eye shape. To further define the top eyelid, tight-line the upper lash line and really thicken the lashes with a dark mascara.
Eye shadow
You’ve heard a bit more detail about ideal application techniques for eyeshadow, but now it’s time to learn more details about the different eyeshadow finishes, colour tones and palettes. When choosing which eyeshadow products to use, it is important to understand how each product will look on the eye. We will discuss a number of different attributes an eyeshadow can have, so you are able to make the most informed decision about which will work for your clients.
1. Eyeshadow Finishes
Similar to foundation finishes, an eyeshadow finish describes how the pigment reflects in the light. There can be eyeshadow finishes that do not reflect any light and appear flat, or some that are highly reflective.
Suggested Read: 10 Tips and Tricks For Hair Styling
As with many products, some brands may excel at certain finishes and fall flat in others. To avoid any issues, always be sure to swatch your eyeshadow choices to make sure the transfer is ideal.
- Matte Finish: Matte finish eyeshadows offer a flat finish, with little to no reflection of the light. They do not contain any sheen or shimmer, which means they offer less highlighting effect on the area they are applied. Matte finish shadows are often excellent options for contouring, because they cast a similar shadow-like appearance. Look for options that are smooth and do not appear chalky.
- Satin Finish: This option falls somewhere in the middle, and is not quite matte but also not extremely reflective. Satin finish eyeshadows have a subtle sheen, and do not typically have a high-finish shine. This shadow is great for a providing a subtle highlight, or for using one shade all over the lid.
- Frost Finish: For a bit more high shine, a frost finish eye shadow is the way to go. These eyeshadows intensify the look of the area they’re applied to, and appear almost metallic. These frost finish eyeshadows do not contain glitter or sparkle, but their finely milled pigment adds intensity and drama to a look.
- Glitter Finish: These shadows follow their namesake, and contain glitter particles in the eyeshadow. The glitter particles can vary in size from micro-glitter to larger and bolder glitter pieces. Glitter finish eyeshadows are a fun option to add a bit of boldness to any look.
2. Warm vs. Cool Toned Eyeshadows
Many brides or clients will have an idea in mind for what they desire their eye makeup to look like. When it comes to choosing the right shadows for your bride, it is important to understand what overall colour tone they are looking to achieve. Warm and cool toned eyeshadows can create very different looks with the same application, so here we will break down the main differences between the two colour tones and some common colours you may encounter.
Suggested Read: Lips, Cheeks and Brows – All You Need To Know
- Warm Toned Eyeshadows: Warmer colours tend to incorporate primarily colours in the red, orange and yellow colour families. Eyeshadows in this family can create a look that appears inviting and translate well to the warmer seasons. A few common shades to look for in the warm tone include:
- Light Coral
- Peachy Nude
- Peachy Pinks
- Coral
- Nude Brown
- Warm Brown
- Bronze
- Cool Toned Eyeshadows: Cool toned eyeshadows fall in the opposite realm of their warm counterparts, and often encompass many blue, green and purple tones. They often look great in the fall and winter seasons, and provide a calming appearance. Some common cool toned shades include:
- Beige
- Pale Pink
- Rosy Pink
- Pale Brown
- Deep Chocolate
- Deep Plum
- Taupe
Eyeliner
Most brides or clients will love the eye enhancing effects of eyeliner on their wedding or special event. However, there are a number of different eyeliners and it can be hard to know which one to choose. Here we will discuss the most common eyeliner formulas, and the pros and cons of each option.
- Brush Tip Liquid Liner: This eyeliner type is a common one for wedding and event makeup, and for good reason. The brush tip liquid liner offers very precise lines, and is great for creating a sharp and dramatic line. Often these liners are able to provide thin lines, and usually offer a great pigmentation. The cons to consider with the brush tip liquid liner include the time and difficulty when it comes to application. Additionally, the liquid formula can often take some time to dry and varies on wear time.
- Kohl Pencil: The original eyeliner, a kohl pencil can create a variety of looks and is very versatile. For those brides or clients looking for a more smoked out lash line, a kohl pencil can create a smoldering look. It is excellent for the waterline or tight-line, and goes on very easily. Since it goes on so easily, it can often smudge extremely easily which may not be ideal for long events. The wear time can be short, and a kohl pencil does not offer the most precise application.
- Gel Eyeliner: Typically, in a glass pot, gel eyeliner is a great option for a deep and precise lash line. Gel eyeliner requires a brush to apply, often an angled brush or liner brush. The texture of gel allows for a bit more leniency when it comes to application, and it is a more precise option than a pencil form. When it comes to wear time, gel eyeliner shines with a long wearing formula. The cons for gel liner include the formula drying up, as well as some difficulty in achieving your ideal application.
- Felt Tip Pen: One of the newer eyeliner options, felt tip eyeliner pens have become a go-to option for those looking for a versatile and precise eyeliner. Because these pens are so easy to apply, they can offer precision without much time for application. You can easily adjust the line, and felt tip pens are easy to control. However, these options do not always offer the most deep or dramatic colour payoff, and can be difficult to remove if needed.
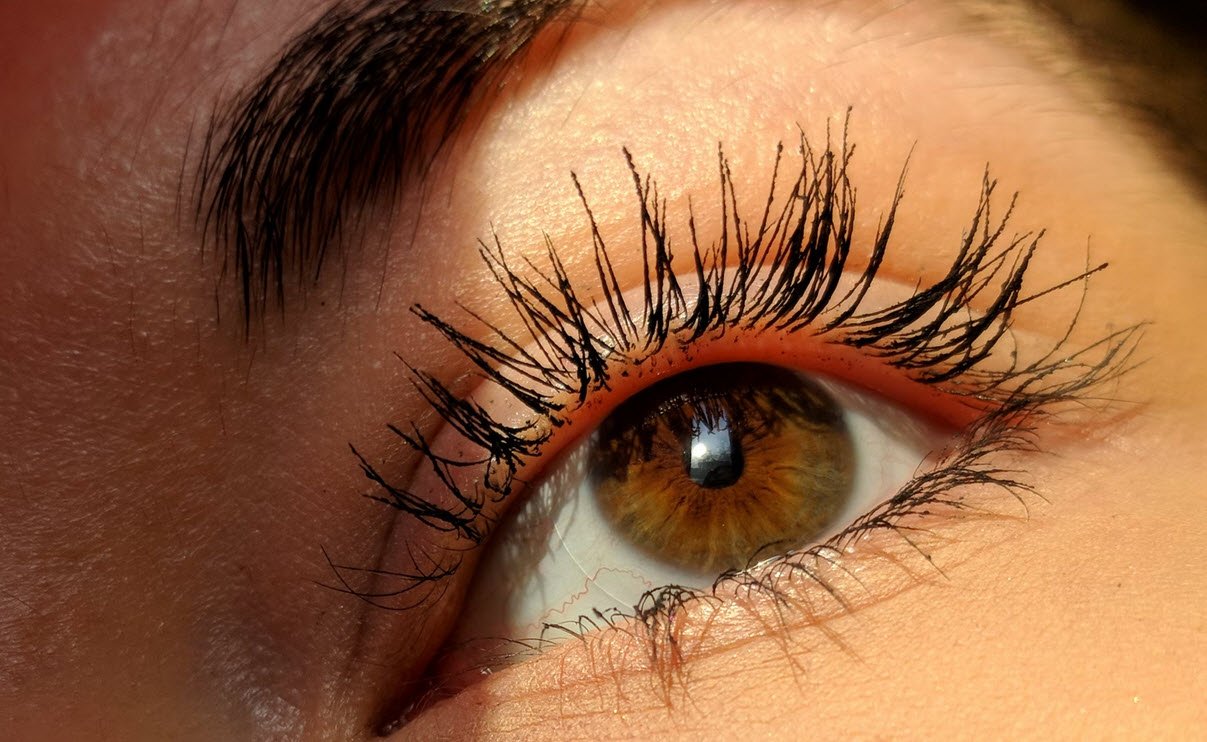
Mascara
Similar to eyeliners, there are a number of different mascara wands that can drastically affect the end result of your lashes. It is essential to choose a mascara that will be able to lengthen and thicken the lashes of your bride or client. We will break down three key characteristics of each mascara wand shape, to allow you to make the best decision of which to use.
- Straight Brush
- Easy to use
- Fully coats lashes
- Access to both inner and outer lashes
- Comb Brush
- Prevents eyelash clumping
- Separates the lashes
- Lengthening
- Big Brush
- Gives major volume to lashes
- Thickens
- Applies more product than other wands
- Small Brush
- Very precise
- Reaches each and every lash
- Great for tricky bottom lashes
- Curved Brush
- Gives lashes more curl
- Lifts lashes from base
- Volumizes
- Sphere Brush
- Reaches each lash individually
- Provides custom lengthening
- More precise application
False Eyelashes
For many brides and clients attending special events, they will be looking to wear false eyelashes for their big day. False eyelashes are an excellent way to add a bit of drama to the eyes, and enhance them. Events and weddings are the perfect time to suggest false lashes to your clients, but it is important to know which ones will look best and how to apply them. Here, we will provide details on choosing the shape of your false lashes and the best technique to apply them.
1. False Eyelashes Shapes
Remember the eye shapes we discussed earlier in this module? Those eye shapes will help you determine which false lashes will work best for your client. By choosing a false lash that accentuates the shape of their eye, you will help define and enhance the eye makeup look you have already completed. Lashes should be your finishing touch, so you want them to make the total makeup look perfect.
- Monolid – For monolids, you can choose nearly any shape of false lash to enhance the eye. We recommend an option that fans out to help even out the eyelids and provide some definition.
- Upturned – Because upturned eyes already have a natural cat eye look, opt for a pair of lashes that are nearly the same length across. This will provide more balance across your upper lid, and will still give you a dramatic look along the lash line.
- Downturned – Downturned eyes have the slight droop in the outer corner, so to combat this go for a pair that is a cat eye shape in the outer corner. By drawing the lashes upwards in the corner, you will provide a natural lift to the outer eye to help even out the look of the eye makeup.
- Round – Since round eyes already have a circular shape, choose a pair of false lashes that are long and fan upwards. Choose a pair that provide natural definition, and may even be longest in the middle. Avoid any heavy looking false lashes, as those can make your eyes appear smaller.
- Almond – To accentuate the symmetry of almond eyes, reach for a pair that gets longer and more wispy towards the outer corner. You can try a demi strip that only goes on the outer corner, or try a set of voluminous false eyelashes that fan outwards.
- Hooded – By selecting the right pair of false eyelashes, you can frame hooded eyes and draw attention to the lid. Opt for a pair that is longest in the middle, with dimension and texture between the long and short lash strands. They should have a natural looking weight and volume to keep from making your eyes look too heavy.
2. How to Apply False Lashes
By following a few easy steps, you can apply false lashes perfectly on every client for their wedding or special occasion.
- Apply Mascara – Curl your eyelashes, and apply 1 to 2 coats of mascara on the top and bottom lashes. This will help your lashes blend in to the false lashes, and create a shelf for the false lashes to rest on.
- Trim Lashes – To ensure the lashes fit each eye, gently place the lashes on the eye (without any adhesive) to determine how much needs to be trimmed. Many false lashes are bigger than the average eye, so by trimming the lashes you can ensure it lays perfectly without any excess.
- Apply Adhesive – Using your lash glue of choice, apply an extremely thin line all across the band of the false eyelashes. Be sure to check with your client for any allergies, as many false lash glue contains latex.
- Let Glue Dry – This is the most important step in the process. It is critical to let the adhesive dry until it gets tacky, so that the eyelash doesn’t slide around on the eyelid.
- Place Lashes Along Lash Line – Gently place your false lashes as close to the lash line as possible, so they almost blend together. Keep the eyes looking down while the glue settles, and adjust as needed until the lash adhesive dries completely.
Factors to Consider When Choosing Bridal or Event Eye Makeup
When it comes down to working with a bride or client for a wedding or special event, you will likely play a key role in helping them decide what their makeup may look like. In order to help make this decision, there are a few factors to consider ensuring it is the best option for your bride or client.
- Dress or Outfit – To determine how eye makeup should appear, consider the style of the wedding dress or event apparel your client will be wearing. If their dress is more bold or contemporary, you may be able to experiment with a more dramatic eye makeup look. Contrastingly, if the dress is more of a romantic style, go for a more subtle and natural look with neutral shades. The makeup should match the feel of the outfit your client is wearing, so be sure to inquire about the style of their dress or apparel.
- Location – When choosing an eye makeup palette and look, take into account the location of the event or wedding. If the event is outdoors, you may need to alter the colour palette or style of the eye makeup you apply. A formal ballroom wedding will likely require a bit more of a formal and dramatic look. If the event is a casual affair, opt for natural shades with excellent application. Determining the venue will help you choose the best option to match your client’s big day.
- Event Style – Similar to location, the style of the wedding or event will dramatically change the makeup choices you make. A country or boho wedding may require a more neutral palette with less harsh application. Contrastingly, if your client is attending a black tie affair it may be appropriate to go for a dramatic eye look to match the style. You want your client to feel comfortable on their big day, so sticking to a style they enjoy will allow them to feel their best.
- Season – The time of year your client’s wedding or event is taking place may help you determine which eye makeup to choose. A spring wedding may be the perfect time to play with a more pastel toned eyeshadow palette, whereas a summer wedding may be a great time for bronze tones or corals. On the other hand, a fall wedding may be a great time for plums, and a winter event would make a great palette for jewel tones. The palettes of the seasons change, so why not match the makeup with it?
Conclusion:
In this article you have mastered makeup application for one of the most important features of the face! For a wedding or special event, it is critical to emphasize the eyes and make them look as beautiful as possible.
You have learned how to determine your client’s eye shape, and the best makeup application for each shape. This article covered eyeshadow, and the many different finishes and tones you have to choose from. You received detailed information about the many types of eyeliner and mascara, and even mastered how to apply false eyelashes!
Lastly, we covered the factors you should consider when it comes to eye makeup for a special event or wedding. By using all this information, you are now able to create the perfect eye look for every bride or special event client!
You may also like:- 10 High-ROI Activities to Accelerate Your Career and Live a Happier Life
- 22 Powerful Open-Ended Questions to Ask a Woman
- 10 Rules That Will Make You Dangerously Confident
- 10 Dangerous Signs of Weak Men
- 50 Masculine Truths 98% of Men Don’t Know
- 13 Fashion Tips To Make You More Appealing To Women
- 12 Things a Father Must Say and Teach to His Son
- 26 Signs You Might Be a Sigma Male
- 17 Psychological Tricks of a Bad Boy That Instantly Hypnotize Any Woman
- 15 Ways to Be the Best at What You Do