Weddings and special event makeup is not complete without finishing off the lips, cheeks and brows. In this article, you will learn about the many different product options for lip, cheek and brow products, and best practices when it comes to proper application. These steps will be the finishing touches for your makeup application, and will complete your bride or client’s makeup look for their big day!
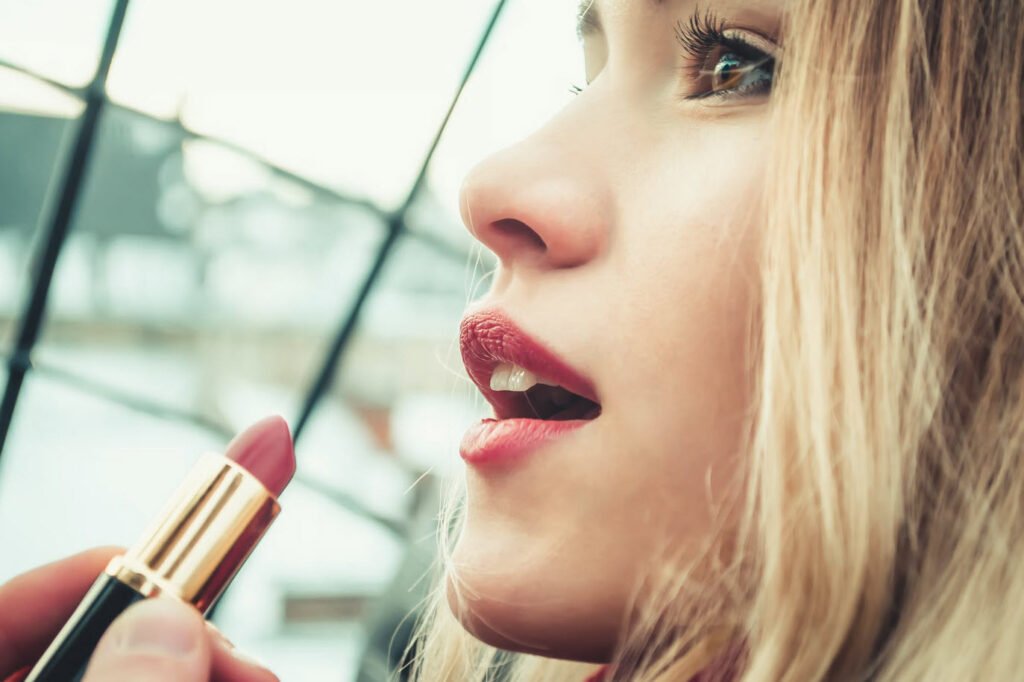
Lips
For weddings and special events, having a beautiful lip can pull the entire look together. When choosing which makeup to apply on your bride or client, it is essential to understand the basics of the many different types of lip products, along with the main lipstick finishes and formulas.
Also Read: Eye Makeup Tips and Tricks – A Beginners Guide
In this, you will learn the many details of lip products and the best application tips.
1. Lip Products
Nearly every day there are new lip products being released, and it can be hard to keep up and know which ones will work. Your clients will have many different needs and desires, so it is critical to understand the many different products and how each of them works. By knowing the pros and cons between all of the different lip products, you can make the best choice to achieve the best look for your bride or client.
a) Lipstick – Lipstick is one of the most basic makeup products, and is an essential in any makeup bag. You can find lipstick in nearly every colour, finish and formula, making it extremely versatile depending on which lipstick you choose.
Lipstick is an excellent option for makeup artists looking to find a large variety of options with one product. They are highly pigmented, and provide an easy application with relatively little room for error. Lipstick is suitable for any age or skin tone, and typically isn’t sticky or tacky. However, the large variety of lipsticks can make it difficult to know which formula or finish will be best for you. Additionally, depending on which lipstick you choose it can wear off somewhat quickly.
b) Lip Liner – Lip liner is typically used underneath another lip product, and can serve a number of purposes. One benefit of lip liner is that it can prevent product from bleeding into the fine lines around the lips. Lip liner can also prolong the wear time of a lip product, by providing a base for the product against the lips.
Another way lip liner can be used is to alter or enhance the shape of the lips. You can use lip liner to make the lips look bigger, smaller or symmetrical. Lip liner offers precision and is much pigmented, but can be somewhat drying on the lips. Unfortunately, it can take a steady hand to apply bold lip liner colours, so be careful with your application.
c) Lip Gloss – Lip gloss is a youthful and easy way to add some shine to the lips. Lip gloss comes in many options, and can provide a number of finishes to the lips. You can find glosses that offer a creamy texture, glitter, shine or shimmer. Lip gloss is easy to apply, and offers a wide variety of colours and textures.
It provides a youthful, healthy look to the lips and can be layered on top of other lip products. Some lip glosses can unfortunately wear off fairly quickly, so they require frequent reapplying.
d) Lip Balm – Traditionally designed to moisturize the lips, lip balms can come in either a sheer or tinted pigmentation. Lip balms can serve as a great base for the lips, and are extremely easy to apply. If you choose a tinted option, it can offer a subtle wash of colour that gives a natural flush to the lips.
Plus, your lips will never look dry when wearing a lip balm! However, if you’re looking for more of an impact a lip balm will not provide much pigment for you, and they can wear off fairly quickly.
e) Liquid Lipstick – This product has the consistency and texture of a gloss, but is highly pigmented and dries down to a lipstick feel. Liquid lipsticks have recently been gaining popularity, so there are a large variety of colours and finishes on the market.
The best benefit to liquid lipstick is the long lasting formula, and the extreme colour payoff from the pigmentation. The formulas can vary between brands, so it is important to do research or test out the products before using on a client. Liquid lipsticks are easy to apply, and are great for events where there will be little to no options for touch ups. Liquid lipsticks can be drying on the lips, so it is important to exfoliate the lips before using.
f) Lip Stains – Lip stains are designed to be extremely long lasting on the lips, since they actually stain the top layer of your lips. They have a fairly consistent finish, and often the colour range is limited. Lip stains are extremely long lasting, and provide a natural stain to the lips.
They don’t offer high pigmentation, but for those looking for a more natural colour this is a great option. Lip stains can be drying on the lips, and it can be difficult to remove if there are mistakes.
2. Lipstick Finishes
Now that you’re knowledgeable of the many different lip products, we will dive into the most common – lipstick. Lipstick is the original lip product, and is a makeup artist staple. For bridal and special occasion makeup, it is important to understand which lipstick finish will work best for your bride or client’s needs.

Here we will cover the most common lipstick finishes, and educate you on the pros and cons of each finish.
a) Matte Finish – Similar to other matte products, matte lipstick has a flat finish with no shine or reflection. Often, matte lipsticks are a long wearing option and can provide great pigmentation. Matte lipsticks will appear smooth or velvet-like on the lips, and apply evenly across the lips.
Occasionally, matte lipsticks can be drying so it may be beneficial to exfoliate or apply lip balm prior to use.
b) Creamy Finish – A creamy finish lipstick will provide more shine than a matte formula, and are often more comfortable on the lips. They do not dry out the lips, but still provide a good wear time. Typically, creamy lipsticks have strong pigmentation and wear evenly throughout the day.
Creamy lipsticks can sometimes bleed into the fine lines around the lips, so creamy lipsticks can benefit from the use of a lip liner around the edges of the lips.
c) Satin Finish – Satin lipsticks offer a subtle sheen to the lips, and are a very comfortable lipstick to wear. They keep the lips hydrated, and offer a very versatile finish for a wide range of colours. Satin lipsticks offer a natural shine to the lips, without appearing too dramatic.
Suggested Read: Get Ready For Natural Face Makeup – A Step by Step Guide
When it comes to lipstick finishes, satin lipsticks are some of the most universally flattering and are a great choice for bridal or special events makeup.
d) Amplified Finish – For those looking for a bold lip with extreme colour payoff, amplified finish lipsticks will be a perfect option. Amplified lipsticks are highly pigmented, and typically offer a long wear time. They are smooth on the lips, and don’t dry your lips out in the same way that matte lipsticks do.
However, amplified finish lipsticks can often stain the area they are applied to, so it is important to be careful when applying.
3. Perfect Lip Application
With your knowledge of the many different lip products, you can now move on to mastering the perfect application. For bridal and special event makeup, it is important to understand how to receive a precise application for your bride or client. There are a few easy steps that you can take to prepare the lips, and apply lip products to achieve a flawless look.
Here, we will break down the most important steps to achieve the perfect lip application.
- Exfoliate the lips to remove any dead skin, and create a smooth base for your lip products. You can exfoliate the lips by using a lip scrub, DIY sugar scrub or by lightly brushing a dry toothbrush against the lips. This will also stimulate blood flow, and make the lips appear fuller.
- Moisturize the lips by using a hydrating lip balm. The easiest way to do this with your bride or client is by applying a moisturizing lip balm at the beginning of your makeup application, and let the lips soak in the hydration while you complete the rest of the makeup. It will soften the lips and ensure any lip products go on smoothly.
- Apply lip liner around the outer edges of your lip, and slightly fill in the outer corners. You can use a coloured lip liner to go with your lipstick colour, or opt for a lip liner that matches the tone of your lips to simply enhance your client’s natural shape. This will ensure your lipstick doesn’t bleed, and can help increase the wear time of your lip products.
- Next, take your lip product of choice (lipstick, liquid lipstick, lip stain) and apply it. You can use a brush for a precise application, or you can apply straight from the tube. Begin applying in the Cupid’s bow, and work your way out slowly and precisely.
- If your bride or client is applying a bold or highly pigmented colour, now may be the best time to go back and clean up the edges of your lips. Using a small concealer or lip brush, apply a flesh toned concealer around the edges of the lip on the skin. This will give a crisp and precise edge to the lip, and is perfect for correcting any small mistakes made during the application process.
- Finish off the look with an optional gloss to add shine and luster to the lips. Not all clients may want a glossy look, so feel free to skip this step if it doesn’t align with the desires of your client. However, adding a gloss on top can create a beautiful, youthful look and is great for many weddings and special events.
Cheeks
When we discuss cheeks in this section, we are also covering the extra steps a makeup artist can take to complete the face. Not only does this include blush, but also bronzer and highlighter which can be excellent additions to a makeup look.
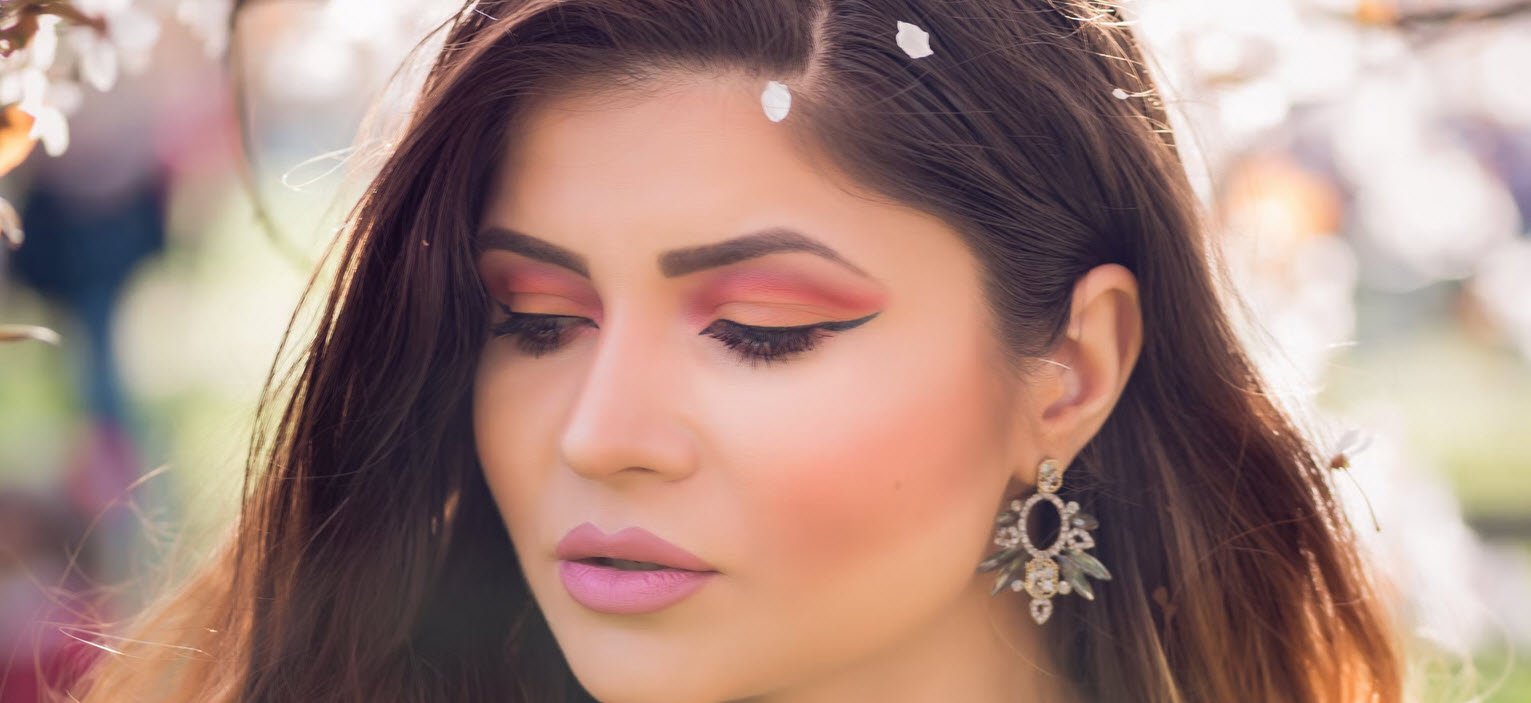
When it comes to these products, there are a number of different options for choices and application techniques. We will cover each one separately, and discuss how you can put them all together to complete the face.
1. Blush
Blush is an essential step for adding colour back into the face after applying foundation, and can give the “blushing bride” look that many brides strive for. When it comes to choosing the right blush and applying it correctly, there are a few factors that can help you decide which product to use. We will cover some of the key considerations when it comes to blushes, and also discuss best practices for great blush application every time.
- Choose Your Formula – Blush typically comes in two different formulas, powder or cream. Both formulas offer a number of benefits, and it is important to know when is the right time to reach for one or the other. Powder blushes are a bit more subtle, and are easier to blend into the skin (especially over other powder products). Powder blush can be easier to apply, and is great for those with oily or combination skin.
On the other hand, cream blush is excellent for those with dry skin, or people who have issues with their skin’s texture. Cream blushes are a bit more difficult to apply, and give more of a dewy look to the skin. They can tend to be more pigmented, so it is important to take a light hand if reaching for cream blush. - Choose Your Colour – Like many other makeup products, blushes come in a wide array of colours to choose from. It may seem overwhelming to choose the best shade for your bride or client, but there are a few easy ways to narrow down your choices. Much of these choices come down to your bride or client’s skin tone. A good rule of thumb is that darker skin tones will require a deeper pigment, and lighter skin tones will need lighter pigments.
You’ve already learned about warm and cool toned colours, and the same rules can be applied to blush! For warm tones, opt for a peach or coral blush. Cool tones should reach for pink or plum based shades.
2. Bronzer
Many people will be looking to have a bit of a sun kissed glow on the day of their wedding or special event, and bronzer will be your go to product in achieving this. However, bronzer can be a bit tricky because you don’t want your client to end up looking muddy or unnatural. Because of this, it is important to know which bronzers to choose for each client.
It is also important to understand the best ways to apply bronzer to achieve your client’s desired look.
- Choose Your Finish – Bronzers come in a variety of options, so you will need to make a few decisions to pick the ideal one. First, decide whether you would like to have a bronzer with shimmer or matte. Shimmer bronzers can offer a luminescent look, but too much can make a face look unnatural. On the other hand, matte bronzers are excellent for contouring and a natural glow, but the wrong shade can make the face look muddy.
- Choose Your Shade – It may seem like bronzer is a one size fits all shade, but that is certainly not the case. Lighter skin will require a much different shade than darker skin, so use your client’s skin tone as the base for choosing the colour shade. To create a natural glow, choose a shade that is 1-2 shades darker than your client’s skin tone. If you’re opting to contour, choose a shade that is 2-3 shades darker. Keep in mind, it is better to go lighter and build up the colour than start off too dark.
- Choose Your Application – Your application technique with bronzer will depend on what you are using the bronzer for. If your goal is to provide a natural glow, the best route is to sweep a light bronzer on a fluffy brush. Apply the bronzer anywhere the sun would naturally hit your face – your temples, cheekbones or jawline. This technique is often referred to as the “3/E”, because you can imagine dusting the bronzer in the shape of a three or “E” on the sides of your face.
The other option to apply bronzer is to contour, which helps enhance the shape of the face. To contour, use the darker shade of bronzer and a dense, angled face brush to apply the bronzer. Use this to darken any areas that you want to appear shadowed, including the temples, hollows of the cheeks or jawline. You can even contour the sides of the nose to make the nose appear smaller.
3. Highlighter
Adding highlighter to a makeup look can make the skin look luminous and radiant, but it is often an overlooked step. Many times highlighter can offer that “lit from within” glow that many people are looking for on their wedding or special occasion. Choosing the right highlighter is important, along with proper application to achieve the perfect look.
Here, we will cover the basics of highlighters, and application best practices.
- Choose Your Formula – Highlighter comes in many forms, including cream, liquid and powder. All three provide different benefits, and can create stunning highlights on the skin. Cream highlighters are excellent for those with dry skin, and give a dewy look when applied. Liquid highlighters offer precision where they are applied, and are also great for mixing in with foundation. Lastly, powder is the easiest to apply and blends flawlessly into the skin.
- Choose Your Shade – Like most makeup products, there isn’t one shade that works for every skin tone. Most highlighters come in two shades – gold based or silver based. For clients with warmer skin tones, the gold based highlighters will accentuate the warmth in the skin, and are great for brides or clients with a darker skin tone. Silver based highlighters are great for those with lighter skin, or cooler skin tones.
- Choose Your Application – Since the purpose of highlighters is to make the skin look naturally glowy with great complexion, it is best to go for a natural application. You can apply highlighter anywhere that you want to accentuate, so it is best to go for the high planes of the face. The tops of the cheekbones up towards the temple, the brow bone, inner corner of the eyes, down the nose and in your cupid’s bow are all some of the best places to apply highlighter.
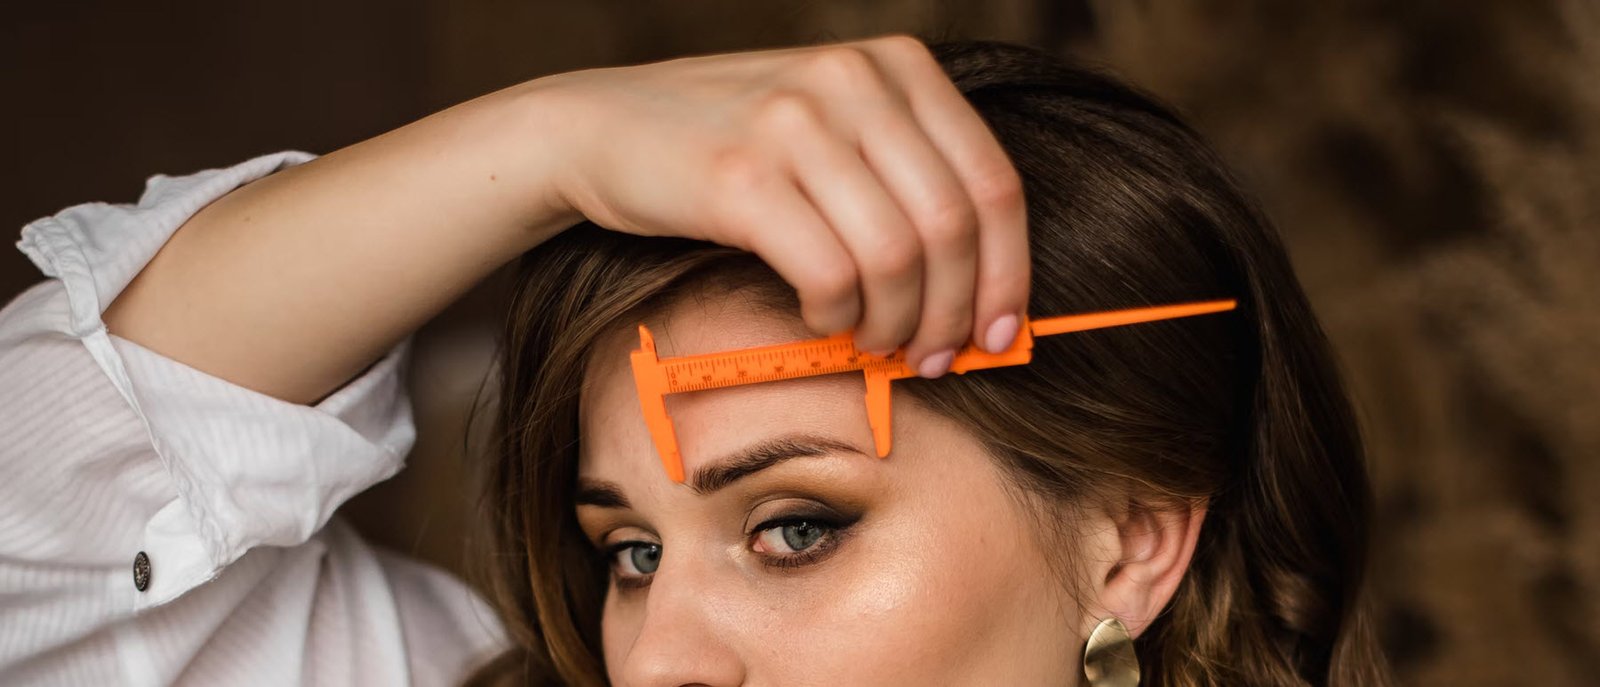
Eyebrows
Eyebrows frame the eyes, so it is essential to ensure they look their best when applying makeup. Defined brows can completely change the look of the face, and it is your job as the makeup artist to finish off your client’s look with beautiful and defined eyebrows. We will break down the main brow products and their uses, as well as a few simple steps to achieve perfectly defined brows.
1. Eyebrow Products
There are a number of products that one could use on the eyebrows, but by knowing a few of the basics you can choose the best product for your client. When it comes to bridal and special event makeup, your client wants a completed look including perfect brows. We will share the best products to achieve defined eyebrows, and when to use each one.
- Pencils – Eyebrow pencils have been a long-time favourite product in achieving defined brows. They can help with filling in sparse areas of the brow, and can help create a hair like effect if used correctly. Look for a brow pencil that applies easily to the skin, but isn’t going to fade throughout the day. Typically a waxy formula with a very fine point will help achieve the most realistic look.
- Powders – Using a powder in the brows can help create a more natural appearance. Typically they give a softer look in the brows, and are great for those who are a little heavy handed with a pencil. Brow powders are applied with an angled brush, and provide a bit more room for error during the application process.
- Pomades – Eyebrow pomades can create an amazing effect in the brows, but are a bit more difficult to apply. Their cream-based formula provides strong colour pigmentation, and is great for those who want a bold, strong brow. Also applied with an angled brush, pomades require a light hand to keep them looking natural.
2. Eyebrow Application
Once you understand how each eyebrow product works, you can choose the one that is best for your bride or client. Creating perfectly defined brows can be easy and effective if done correctly. There are a few simple steps to create perfectly defined eyebrows, and once mastered it will take you only a few minutes.
- Basic Grooming – If there are any stray or errant hairs outside of the natural brow line, be sure to tweeze or wax those for your client prior to application. Don’t go overboard with this step, and only tweeze hairs that are truly outside of the brow.
- Determine Shape – It is important to know where your brows should start and end when filling in the eyebrows. Place a makeup brush along the side of your nose straight up, and where the brush meets your brow is where your brows should start. Angle the brush to the outer corner of your eye, and where the brow intersects is where it should end.
- Define Edges – Start filling in the brows by defining the start and end of your brows, as well as defining the arch. These are the key areas of the eyebrow, and will serve as a frame for the rest of your brow product.
- Fill In – Once you’ve set up the definition for your brows, start filling in the other areas. Use short, hair like strokes to achieve the most natural look while still creating definition.
- Finish – You can finish off your final eyebrow look by setting the brows with a clear brow gel, or simply running a spoolie through the end result. This will help set the brows in place, and ensure they look perfectly defined all day long.
Conclusion
In this article you learned information about the products and application for the lips, cheeks and eyebrows. We discussed the many different lip products available on the market, the difference between lipstick finishes and the best way to achieve a perfect lip.
When it comes to cheeks, this module covered the options for blush products and how to choose the best colour for your client. You learned about bronzers and the best application for both adding warmth and contouring.
Highlighters are an important step in finishing the face, and this module discussed the differences in shades and best application practices. Lastly, you learned about the most common brow products and how to achieve perfectly defined eyebrows.
This will complete the finished makeup look for your clients, and will leave them with the perfect makeup look for their wedding or special event.
You may also like:- 10 Common-Sense Self Defense Tips for Men
- How to Understand That Your Life Is Changing for the Better
- 10 Rules To Become Dangerous
- 8 Steps to a Smooth Divorce
- Personality Development – 4 Essential Aspects You Should Always Strive to Improve
- Some Hidden Facts of Muhammad Ali (The Greatest Boxer)
- 15 Signs You’re Mentally Stronger Than You Think
- From Risk to Reward – The Journey of Growth and Achievement
- 10 Rules That Will Make You Dangerous
- 8 Reminders to Live By That Can Help You To Solve Problems